Sample Article
What should you use the Article content type for?
The Article content type is intended for content that is time sensitive, such as a piece of news, a blog post, or an announcement.
How to Create an Article
- Click on Content in your admin panel
- Click the on the blue Add Content button
- From the list of content types, select Article.
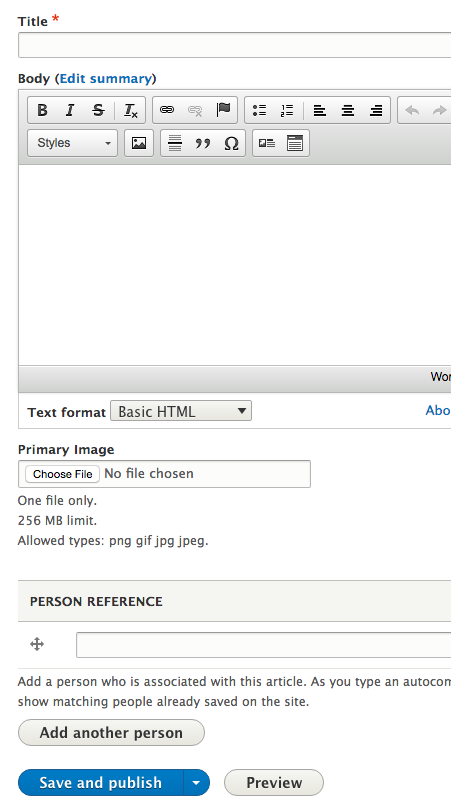
- At a minimum, you need a Title and some Body content. If you're uncertain what the icons in the WYSIWYG can do, review the instructions on formatting your content.

Article Sections
- Title - required. Text entered will be used as the title of the page, included in the breadcrumbs, and become the page's URL unless otherwise configured. When linking to this article from other locations, you'll locate it using the article's Title information.
- Body - A WYSIWYG interface provides you the means of adding in your article's main content.
- Edit summary - included if any Body content is added. This information will be used in other locations in your site as a teaser or introduction to the full article. By default, the system will use your text exactly as written in the body up to a certain number of characters (the first 140 characters, as an example). You can change what the summary says by clicking on the Edit summary link and editing the content.
- Primary image - optional. If present, it will be used on the article's page and any location where the article is listed.
- Document attachment - optional. You can browse and upload files to be attached with this page.
- Add Person(s) - optional. A person page has to have already been created first before you can link to it from your Article content type; simply start typing the person's name and SiteFarm will assist with an autocomplete feature. You can add multiple people. If you see a number in parentheses follow the name this is normal; the number represents a unique ID number or identifier that has been associated with that piece of content.

Additional Options
Additional options are available on the right side of the screen.
- Create new revision - Allows you to create a save point in the content's history to which you can roll back. Read more about revisions.
- Menu Settings - Found on the Basic Page and Photo Gallery content types, allowing users to create pages that can be added to menu systems.
- SEO - Search engine optimization options. We recommend using the Description field and leaving Abstract and Keywords empty as fewer search engines use these terms any more.
- Simple XML Sitemap - Provides controls for determing if a search engine will find the page, and also what weight the page, if visible to bots, will carry in the search results. Read more about the simple xml sitemap.
- URL path setting - Provides information about the URL Path name generated for your content based on the TItle you entered when the content type was originally created.
- Authoring information - The user name of the individual who originally created the article. Can be manually updated provided that the user exists in the site.
- Categorizing - Options for assigning branding and tags, allowing for cross-referencing and content collections by tags. Read more about this in Taxonomy.
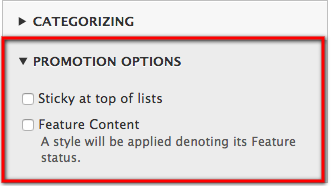
- Promotion options - optional. You can configure this article to be placed at the very top of a list of articles, or configure it to appear styled as a feature artice. Read more about promotion options.
I've created my Article, but where is it now?
You have two methods to locate your Article content.
- Through Structure > Content and scrolling through your list of created content to find your Article, or;
- From your screen view, locate your site's primary navigation menu and, depending on the type of Article you created, you can see your content in either the Blog or News pages. Both these pages are built using a View, which has been designed to display all content of the Article blog type or Article news type respectively.
